This is default featured slide 1 title

Go to Blogger edit html and find these sentences.Now replace these sentences with your own descriptions.

This is default featured slide 2 title

Go to Blogger edit html and find these sentences.Now replace these sentences with your own descriptions.

This is default featured slide 3 title

Go to Blogger edit html and find these sentences.Now replace these sentences with your own descriptions.

This is default featured slide 4 title

Go to Blogger edit html and find these sentences.Now replace these sentences with your own descriptions.

This is default featured slide 5 title

Go to Blogger edit html and find these sentences.Now replace these sentences with your own descriptions.

Thứ Tư, 27 tháng 4, 2016

Gmail more customization options wallpapers

Recent offers Gmail has added new features that add your favorite wallpapers which you can install your own customized according to your standard. This is a new feature of Gmail because previously it was limited by the available samples of Google had.


To use this new feature, please visit the section of Gmail settings and click Themes and columns. Then the next item you select Custom Themes, and click Next noticed the link "Change your background image" below. Then the user can choose the photo collection on their Google + or paste the URL of the image to choose as wallpaper for your own Gmail. Google also added the ability to browse and search for high-quality image to set as the theme. it can be due to network or how it should be possible that some users probably will not get this functionality you can patiently wait by Google will apply new features for all users in the near future to come.


See more :  Quick ways to cut cables to Gmail, Gmail login fast

Quick ways to cut cables to Gmail, Gmail login fast


There are times it will be broken fiber or is broken when you log in to Gmail will feel slow due to traffic congestion, so then you will feel very uncomfortable, right? vikhi that it will cause you to lose distance when to access Gmail to solve your task. And here we will help you overcome this situation ... the same view you with anything.

Gmail is an email service round quite common for today, with Gmail, users can sign up for Facebook, the social network account set up, and many other services connected with Gmail. Users can create their own one Gmail address from the Google homepage, if you do not know how to sign KSY gmail you can refer to the article how to register gmail.
Due to the incident optical fiber rupture AAG should use Gmail e-mail is very limited, very slow to load mailbox can not even get in. To not be the phenomenon, here we will guide you how to fix them, invite you to consult.


Beneath this is the way to be able to overcome the situation in Gmail slow due to bad network.

Method 1: Use tools to receive, send and email notification 
In fact there are quite a lot of software support Gmail login screen right on your computer. In this article we will refer to the Reader software Gmail Notifier - One software is appreciated by the online community, even the author of this article

ADVANTAGE:
- Suitable for slow networks, weak.
- Receive and send email right on your computer screen.
- There notified when new email.
- Limit the number of emails displayed (20 emails), if you want to display more then you purchase a software license.

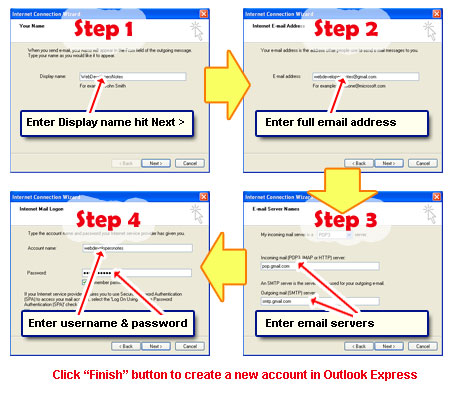
How to use Gmail Notifier software

STEP 1: You download and install the Gmail Notifier here: Gmail Notifier.
STEP 2: After installation is complete Gmail Notifier, you start up the program, you will see the following interface at first. (Picture below).
Here visualization software and interface language of the software, here I chose English and horizontal interface as shown in Figure.


STEP 3: Configure Email
In the main interface of the software, select MANAGE ACCOUNTS, a window set your email address will be displayed, click on ADD to add a new email.
NOTE: In case you want to add more email, you do the same.


In this step you choose GOOGLE GMAIL ATOM


Here you select gereral, in Account Settings Section gereral information you enter your email
- Description: Enter the name of the email, you type so easy to remember, the purpose of classifying an account when you add another email address.
- E-mail address: Enter your email
- Password: Enter your email password
After entering all the information, click on ACCOUNT SETTINGS TEST to check if your account information is correct or not your mail. If yes will be notified OK, if not correct, check your mail account and password and start again.


Finally click OK, at this time the software will send the email in your account and displayed in the software interface


OW TO OPEN / SEE EMAIL:

To open the email from your inbox the need to double-click an email like to see, email information will display in the right column of the software.
Here you can Reply, Forward, ... This e-mail by going to the right corner ACTIONS software

HOW TO SEND EMAIL:

To send an email with Gmail Notifier, on the interface of the program, click on the NEW E-MAIL section, where you enter information such as the recipients, Cc, email subject, content, images, ... both Attachments,...

Get notified when a new email:

After you set up the email account information successfully, when a new email, the program will be announced at the right, the bottom (spot clock hours) on the computer screen.
Method 2: Switch to the HTML interface
Basic HTML interface displays the full range of email information you need, enough to meet work, your needs, only looked at it "monotonous" and "classic" as the name of it
To switch to this interface, pending Loading your Gmail click Load Basic HTML (Figure below)


Then you can easily get into the main interface of Gmail. To return to the familiar interface you click Switch to Standard View or set the default HTML interface you click Set as Default Basic HTML View


Method 3: You use the Gmail interface for mobile devices.
To get to this interface, on your web browser, enter the address then log into your Gmail normal. You will then get into your mailbox quickly (Figure below)


Customize Gmail faster to enter for next time
Gmail also partly due to slow load when the load on gmail it functional, gadget comes with optional functions you can fully optimize your Gmail to log into gmail faster for times next

After logging into Gmail, you can turn off some features that are not required to log in to Gmail process easier

1) OFF FUNCTION IN GMAIL SHOW NEWS VIA RSS (WEB CLIP)

In Settings, go to the Web tab and uncheck the Show my clips above the Inbox web (Figure below)


2) GMAIL LAPS OFF FUNCTION

In Settings, go to Gmail cards Laps then hides unnecessary features by integrating Disabale then select Save Changes to save strangers


3) MAXIMUM NUMBER REDUCED VISIBILITY IN EMAIL INTERFACE

With the default mode, the number of email display 50, you can drop below that to be easier to Gmail by clicking Settings, go to General tab. In Maximum page size you selected items 10, 15 or 20 .... then saved

Above is the sum of the ways that you can log into your Gmail account quickly when there are problems on the network. We hope that it will help a lot for your work as well as learning.


Thứ Ba, 26 tháng 4, 2016

Change Gmail settings (Android)

This information is for the Gmail app for Android 4.0 and above.
The Gmail app for Android has two types of settings:

1. General settings for all accounts on your device.
2. Account settings that only apply to a specific account.
In the Gmail app, touch Menu menu, then select Settings.


General settings
Here are the available settings when you go to Menu> Settings> General settings.
Taking into account the default email (archive or delete)
    You will be more likely to archive or delete a message? You can choose whether you want to archive or delete the default option when you swipe a message in your inbox or open a message.
Note: For non-Gmail account, its default is always removed, so that even if you change this setting to store, your message has also been deleted ran out

swipe action
Quickly archive or delete an email without opening it out - you just swipe right or left. If your default action is set to store, swiping store and if your default action is to delete, swipe to delete. You can set your default action for the above settings.

Reply
When you reply to a message from the app, your behavior was the default is the only answer to sender. then you just click reply and when you compose a message and then press the submit button. Check your sent messages box to check if you sent it yet

The message AutoFit
When this is set to AutoFit mode enabled, the big message this unique format it will be automatically resized so they are easier to read on your mobile device. Learn more about how to make a more readable

Auto-advance
Set Auto-advance allows you to choose what you see after you delete or archive a message you're reading. You can choose to be taken to newer or older conversation, or go back next chat list.

Confirm before deleting / archiving / send
If you had to see the lake is ever sent, deleted or archived a message by accident, you can help ensure this does not happen again. If you check the box to delete, archive, or sent, you will receive a notification pop-up to confirm that you want to have this action.

Account settings (Gmail or Google Apps)

And here are the settings that are available when you access the Menu menu, then select Settings, and choose your account. If you have multiple accounts, these settings will only apply to the account you that you have chosen.
type inbox
Default Inbox organize your mail into optional categories such as Social, Promotions, and Updates.
Priority Inbox is a list of conversations from your Inbox that Gmail or you have labeled important.

inbox categories
You can choose to show or hide many categories as you need. Hidden messages will appear in Primary.

Change categories in the Gmail app are reflected in the desktop version of Gmail, and vice versa. Learn more about inbox categories.
This setting is not displayed if you've enabled Priority Inbox

Picture
Gmail will automatically be shown the images in your messages. If you have a mobile data limit, you may want to change your settings to Google asking you before showing images.
Some Gmail settings, like creating a label, are available only in versions of desktop Gmail 


Change or reset your Google Account password


Google account password is the password that you are using for other Google products including Gmail and YouTube are. There are cases where you have forgotten your password or if you have anyone that enters your account because they know the password, then change the password you want to go too, to want to know your Google password change as do you see the steps below.

Forgot password
If when you forget and you do not remember anything about the password of your Google account, then you follow our steps below, and then to set a new password.
 Go to the trouble signing in Gmail

  1. First you open up your Gmail.
  2. Then you select "I do not remember my password."
  3. And you just enter your email address and follow the instructions on the screen.


Change Password
When you feel like changing the account's password, then you can change the password of your Google account whenever you want to change it.

  1. First you sign in to your account.
  2. In the "Sign in to security", select Sign in to Google.
  3. Choose password.
  4. Enter your new password, then select Change Password.

Important: If you're running Android 5.1 or higher on your device and need to do a factory reset, you need to wait 24 hours after changing your password to reset your device . For security purposes, you can not use an account if the password was changed within 24 hours to set up the device after a reset. Learn about how to protect your phone

Require password
Google account password is at least 8 Are characters. Passwords can include:
  • Uppercase and lowercase. Password is case sensitive, so the "G" is different from "g".
  • skull
  • The symbol: "# $% & '() * +, - /:;. <? => @ [\] ^ {|} ~
  • Spaces: You can not use a space at the beginning or end of your password, but the password space inside as well.

Remember that you should not let the password is too simple for them to guess such as "12345678" as the password can be guessed very easy and so we also have blocked some passwords like

See more : 

Chủ Nhật, 24 tháng 4, 2016

Gmail on Outlook Express - download emails to your computer

All of these free email accounts serve forwarding and POP / IMAP access which you can use to download email from your online account with Outlook Express program to store a copy of a letter your Gmail on your computer. In this process it is just simply that you will find a step by step guide with screen shots of it. Please note you that we can use these options do not POP and IMAP access.
Forward your emails
Do you have an email account configured in Outlook Express? If so, you really do not need to add Gmail to the customer. You can forward all your Gmail emails to that account. It is simple and quick. If you're like me and wish that keep things "organized" (the quotation marks is because it's my work habits - you know what I mean), read the steps below to add Gmail to your Outlook Express.
Step 1 - allows you access to the Gmail POP
First to add Gmail to Outlook Express is to confirm is enabled POP access to your account. Log into your Gmail account and go to Settings section (link found near the top right). Under the tab Forwarding and POP / IMAP, scroll to the item you selected POP Download and activation by selecting choosing one of two options: Enable POP for all mail (even mail that's already been downloaded) or are you going select Enable POP for mail that arrives from now on. Now you choose what you want to do with the copies of e-mail messages - to give it in your Gmail account, delete it or archive. We also recommend that you select the first option of keeping a copy of the online accounts (with ample amount of space, so why bother?). Please click "Save Changes" at the bottom.


Step 2 - As you add Gmail to Outlook Express
  Go to this section will be the fun part of adding Gmail to Outlook expre. In this process is fairly straightforward with you - you just follow the instructions and screenshots below.

You start Outlook Express and click on Tools -> Accounts, then display the Internet Accounts window. You try clicking on the Mail tab in the pop-up and then Add -> Mail.


Windows Internet Connection Wizard is currently awaiting your input. You start by entering the display name that can be anything you want - your name, company name ... anything there.
Subsequently, enter your full Gmail address of the friend.
For configured email server, enter smtp.gmail.com is pop.gmail.com and incoming and outgoing mail servers, respectively for it.
Finally, please provide the program with your Gmail username and account password gmail and click "Finish" when done.

You are back to the Internet Accounts window which now shows a new Gmail account is created as pop.gmail.com. You do not close this window just yet because we still need to modify some settings. Note that: If you close this window, you can bring it up again by clicking on "Tools" (from the top menu), select "Account" and then scroll to the "Mail ".


Almost we simply configure a new Gmail account, you've added to Outlook Express. Select the account pop.gmail.com from the Internet Accounts window and click Properties window that pops up email account properties.
This is the General tab, enter a name to describe your account. This step is optional - you can keep or change its pop.gmail.com anything! Fill in the organization and respond to the address field - this is also optional, but encouraged.


Now you go into Advanced.De tab check box in front of the server requires a secure connection (SSL) under Incoming and Outgoing both parts. Incoming mail port number (POP3) changed to 995. Set 465 in the area of the port of departure.

Finally you click the Services tab, and you put a checkmark for "My server requires authentication".
Click "Apply" and then on "OK".
And now you've got a successful configure your Gmail account in Outlook Express email program.


See more :

Thứ Sáu, 22 tháng 4, 2016

Use Gmail to send photo or picture via email to friends and family

Writing primarily for beginners, this tip detailing how to use Gmail to send photos or images via email. Only photographs in digital form can be emailed - pictures taken from digital camera you've been so and those who are in your photo album (especially those images forever young not old black and white.) Need to be scanned. Once in digital form, copy them to a folder on your computer's hard disk. If you do not have a scanner, take the services of the central desktop publishing closest.

Composing a new email in Gmail to attach pictures or images
Log into your Gmail account and make sure you are using the newer version of Gmail. This way, you can also use the older version of Gmail to send pictures and images, but the instructions and the photograph on this page have been working out the new version of the standard. For learning how to switch from one version to another, please refer to the article on the two versions of our Gmail


And now you will see a screen display like the picture below - start creating email messages by first entering the recipient's email address in the "To:" and then the email subject. And then you can type in your email there. The images can be mounted at a later stage - no problem.


Attach photos
Now it is interesting to you.
You can find a link Attach a file only in the fields email threads? Please Click it. It will change to a button, select a file. When you press this button, then you will receive a pop-up window through which you browse to the folder on your hard disk images or image album. Double-click the desired image or simply select and click on "Open" in the pop-up that


For you to attach another photo in Gmail, you follow four steps that I mentioned above.
Please Note: time to perform attach and send photos via Gmail depends on the speed of your internet connection and the size of the image looks like. If the images are large in file size will take more time, but especially of your home intrernet been slower network connections.

If you unfortunately have attached a photo by mistake, you can always click on the "remove" to remove it from the email message. When you have completed the installation of the image and the image, click on the Send button to send Dy.

See more : How to enable 2-step verification

Thứ Tư, 20 tháng 4, 2016

How to enable 2-step verification

2 layers of security with password will enable Gmail account inviolable. Two-step verification is one of the security features of Gmail extremely robust in general and Google in particular.

If you open the 2-step verification, whenever you sign in to Gmail, a message containing a confirmation code will be sent to your phone number you signed up 2-step verification. If you do not receive this code, you will not be able to log in to Gmail. If you open this 2-step verification, the potential loss of your Gmail account becomes very difficult.

Note: When you turn on 2-step verification for Gmail account, it means that you also enable 2-step verification for all other Google services such as Google Plus, Google Maps, Youtube ...
What you need to prepare to turn 2-step verification for Gmail
1.Sign in Gmail account.
2.There is a phone number (you can use a phone number 2-step verification for multiple Gmail accounts).

Instructions on how to turn on 2-step verification for Gmail
Step 1: Access to the following
Step 2: Click on the Security tab, scroll to Signing in to Google and select 2-step verification.

Step 3: Click on “Start setup“


Step 4: Enter your phone number  for Gmail to send a verification code to your 2-step cell phone number, there are two ways to send the code which are  Text messages (SMS) and Voice call . In this case, I will choose Text messages (SMS).


Having made your choice, click Send code.
Step 5: Gmail will send a confirmation code of 6 numbers for you. Enter this code  into the frame Enter the verification code and click Verify.

Step 6: Establish reliable computer. If you’re using a personal computer, you can tick into the box Trust this computer so that the Gmail’s login later on this machine will not be required  2-step verification anymore and vice versa. Click Next to continue.

Step 7: Click Confirm to agree to enable 2 – step verification for Gmail.

Now that you’ve already turned on 2-step verification feature for Gmail. From the next time you log in to Gmail, you will be asked to enter the confirmation code which is sent to your phone, without this number, you will not be able to log in Gmail (The computer is selected as Trust will not be required 2-step verification as well).

See more : How to create group email in Gmail